As you know, people have always appreciated curly hair very highly. Such a fashion reached its peak in the eighteenth century, when such hairstyles were widely distributed both in Europe and in Russia. Wigs cost a lot of money and, therefore, many were forced to style their own hair using available tools.
It was then that most often used for this small patches of cloth and pieces of paper. Despite the fact that at first glance it seems impossible, this method allows you to get a truly beautiful conger, which in quality can compete with curls made in the cabin.
In addition to the most obvious advantage of this method of waving - availability, such cheat also has a number of advantages that distinguish it favorably.

The first thing I want to mention is the convenience and versatility of the wave. Anyone who has tried at least once to wind the bouclés with ordinary hair curlers knows that it’s almost impossible to sleep with them. If you do it in the daytime, then at least for 6 hours you break out of life - with similar structures on your head it is simply impossible to go somewhere.
All this means that using curlers, you either condemn yourself to a sleepless night, or else lose half a day. If we are talking about curling with paper, then there can be no discomfort. The paper is soft and therefore you can safely go to bed with it, while this your dream will not be anything different from the usual.
Another point that just needs to be covered is safety. Of course, in order to curl curls with curling it is necessary to spend several times less time than if you decide to twist them on curlers or as in our case on pieces of paper. However, this speed is also associated with serious negative consequences for the health of the hair.
Exposure to high temperatures destroys the hair structure, making them thin and brittle. If you turn the curls on paper, then such a detrimental effect on them is not. In general, such a perm is completely safe for both hair and scalp. That is why this procedure can be done at least every day and daily to please yourself and others with beautiful curly hair.
Cons of hair wrapping on paper ↑
First of all, it should be noted that this procedure is unlikely to suit owners of thick and tough hair. This is typical for all varieties of cold curling, and not just this particular method.
With a high degree of probability, as a result, you will end up with a barely noticeable waviness, rather than full curly hair. Of course, the situation can be slightly corrected by the use of special styling products, but no one can guarantee a quality result.
You also need to focus on the fact that any perm requires some experience. It is possible that in the first times your curly hair will not look exactly the way you imagined it.
Here there are a number of factors that determine the success of the procedure, it is the proportionality of the strands, and the method of wrapping and fixing. Therefore, do not be afraid to experiment, after several attempts your skills will increase, and you will easily curl curls even on the objects at hand.
How to get curly hair with paper (method # 1) ↑
We need a fairly thick paper, the best for this suit cardboard. You will also need to take small patches of fabric or laces.
- Cut a piece of paper into small strips with a width of about five centimeters. There should be as many of these bands as you want to get curls in the end.
- We twist tubules from them, the size of our future curls depends on their diameter.
- Wash hair thoroughly with shampoo, after which we dry it to a semi-moist state with a towel. If the hair is already clean, you can splash it out of the spray.
- We apply a special styling tool for the entire length of our hair.
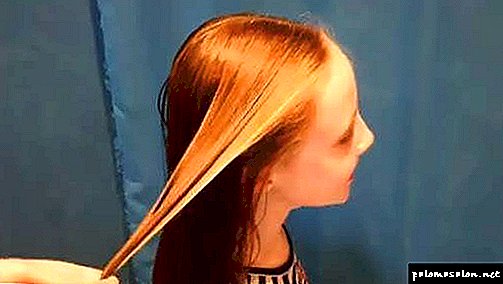
- Next, you need to divide the entire volume of hair into separate strands. The thinner the strand will be, the finer your quiver will be. For convenience, you can use the hairpins or pins.
- Now we twist the strands on our tubes, starting from the temporal zone.
- When the hair is completely twisted, we pass through the cardboard cylinder with a cord or flap of fabric and tightly tie it, fixing our curl.
- Go to the occipital region and do the same. Then to the opposite temporal and end the top.
- To perm succeeded we need to wait at least six hours, the most convenient is just to go to bed.
- In the morning or after the specified time, carefully untie the laces and remove our tubes.
- With the help of fingers, we form a hairstyle and spray it with varnish.
How to wind curls on paper towels (method # 2) ↑
For this procedure, we need toilet paper. If you are somehow embarrassed, you can take paper towels, they are even more convenient to use.
- We divide the paper into pieces about 15 centimeters long. After that, fold each of them twice in width and in length. It should be quite a dense piece of paper.
- Doing the same preparatory actions with hair as in the past.
- Having formed strands, we wind them similarly in the middle of our paper.
- When the paper is wound up to the root area, we tie it in a knot.
- After all strands are curled go to bed. Curls curled in this way bring even less discomfort than when wrapping on cardboard, so sleep will be as comfortable as possible.
- In the morning we remove the paper, we can even break it, because we don’t need it anymore, and form the hairstyle we need, which we fix with varnish.
By the way, those thick paper sleeves, which are found in some rolls, can be used as large curlers. To do this, use our first instruction how to make curls out of paper presented above. As a result, you will get rather large curls, although you are unlikely to go to bed while curling with them.
Making paper files
To create paper files you need to prepare:
- Paper with thick sheets. It is better to find white (clean school notebook, A4 sheet, album sheet, etc.). Color paper will not work. It will color the skin or hair, and newspapers should not be used either, because paint from them can flow.
- Cotton, linen fabric or bandage.
- Scissors.
Prepared paper should be cut into 8 cm by 15 cm rectangles. A rag or bandage should be cut into ribbons 15-20 cm long. Then put the cut fabric on the paper and wrap it in a bundle so that the shred remains in the middle. The result will be a flexible paper file.

You can not use fabric and only wrap paper in bundles, but it is more difficult to twist your hair on them. Prepare papilotki can be in any quantity, the more they will be used, the more lush curls.
Twisting hair on pieces of paper: instructions for child and adult
It is necessary to twist on paper paper files only clean and dried hair. They should not be wet, because they will not have time to dry and curls will not work, but it is permissible if they are slightly wet.

It is desirable to wind hair on pieces of paper for the night and then the received curls will be able to hold out all day.
- To begin with, comb your hair and in a chaotic manner divide it into strands.
- If necessary (if the hair is straight and heavy), treat the locks with mousse, gel or varnish.

It may not even be possible to wind the hair on paper the first time, but having worked it out you can continue to make wonderful hairstyles with natural curls. In this case, no one would guess that they are created with the help of pieces of paper, and not with the use of special hairdressing salons.
The advantages of paper files for curling hair

There are many advantages to using paper files:
- Their price. Cloth and paper will always be at home, while saving money.
- Comfort. With them, you can safely cook, wash, clean, wrap pieces of paper do not interfere and do not bring discomfort at night, as curlers do.
- Security. They do not injure hair, do not violate the structure and do not overdry it.
- Efficiency. Curls are obtained even for those who could not create them with the use of curlers.
 Simple pieces of paper make you beautiful with wavy curls
But there is one drawback for these folders, it is that not everyone succeeds, immediately curling the hair on pieces of paper. You can eliminate the only negative over time. After a bit of training, paper files will always be wound quickly, and curls will be neat.
Curls curls
Decide in advance what hairstyle you plan to create. For lush stacks of curls will need a lot of paper curlers, on each papilotku will need to wind a thin strand. If you want to give your hair a natural look and natural volume, you can curl wider curls.
Wash your hair, dry and treat your hair with mousse or curling spray. Properly selected tools will fix curls. If you like folk recipes, wet your hair with beer or a pre-prepared decoction of flaxseed. You can do and slightly sweetened with water - soak your hair with a spray bottle and proceed to the curl.
Slay the bulk of your hair at the crown. Start the curl with the temples or the neck, at last curl around the face. Separate the thin strand with a comb, attach the tip to the file and twist the curl, trying to make it as smooth as possible. Reaching the roots of the hair, tie the ends of the scraps. To make your hair look as natural as possible, wind your hair in different directions.
When finished, dry your hair with a hair dryer. With paper files you can go to bed, future curls will not be crumpled and are not deformed. Before removing the curlers, make sure that your hair is completely dry.
Do you want to bring beauty cheap and angry? Use the secret of our great-grandmothers and create wonderful curls using ordinary rags. Yes, you are not mistaken! Learning how to wind the hair on a rag, you master the greatest cunning of the last century.
Rags - the benefits of perm
If you compare the usual fabric with tongs and curlers, then the advantages of the first will be undeniable:
- This method is considered the most gentle and safe, because it completely eliminates the heat treatment of hair,
- Waving does not cause any discomfort, with soft fabric curlers you can safely go to bed,
- Proper execution of instructions will allow you to achieve excellent results, not inferior to salon procedures. You do not have to spend time and money on the services of masters. In addition, you can wind the strands even on the road, because it does not need any additional devices,
- Availability is another significant plus. So that something, and a piece of material there is in the closet of every beauty.
Important editorial advice
If you want to improve the condition of your hair, special attention should be paid to shampoos that you use. A frightening figure - in 96% of popular brands of shampoos are components that poison our body. The main substances for which all the troubles on the labels are labeled as sodium lauryl sulfate, sodium laureth sulfate, coco sulfate, peg . These chemical components destroy the structure of the curls, the hair becomes brittle, lose elasticity and strength, the color fades. But the worst thing is that this stuff gets into the liver, heart, lungs, accumulates in the organs and can cause cancer. We advise you not to use the products in which this chemistry is located. Recently, the experts of our editorial office analyzed the sulfate-free shampoos, where the first place was taken by the funds from the company Mulsan Cosmetic. The only manufacturer of all-natural cosmetics. All products are manufactured under strict quality control and certification systems. We recommend visiting the official online store mulsan.ru. If you doubt the naturalness of your cosmetics, check the expiration date, it should not exceed one year of storage.
We are preparing for the creation of "rag" curls
Before embarking on curls, you need to prepare the "instrument of labor" itself. For this you need only two things - scissors and natural fabric, which you need to cut into strips 1-5 cm wide and 10-15 cm long. You can twist the hair directly onto the fabric, or you can use an additional layer in the form of paper (small pieces 5x5 cm).
And you can use baby wipes:
Rags instead of curlers - step by step instructions
How to wind the hair on rags? Take advantage of our photo lesson.
Step 1. My head is with shampoo, because curls are “taken” only to clean hair. Dry them with a towel.
Step 2. We carefully comb the comb and apply mousse, gel, foam or any other means. In extreme cases, we use folk remedies - beer, sweet water or tea brewing.
Step 3. We divide the hair on not very thick strands.
Step 4. Fix the tip of the strand in the central part of the patch and twist it to the desired height.


Step 5. Tying a rag on a knot.

Step 6. We wind the whole head in this way.

Curls and neat curls always caused a sweet smile to others. And let the fashion for them be long gone, yet sometimes you want to nostalgically plunge into the past and pamper yourself with interesting, childishly direct and slightly disobedient curls.
Progress does not stand aside, and today we are offered curlers of various thicknesses and varied densities, curling irons and professional stylers to create the most elegant curls. Just think, and yet our grandmothers still managed to do without curlers and hair curlers. And how did they do it ?!
Everything is very simple. Several decades ago, hair was successfully wound ... into pieces of rags, using a bandage or cotton cloth and paper. If you want to try, but do not know how to twist the hair on rags? It is very simple, and the creation of curls using this method has several advantages.
What is the indisputable advantage of "popular wisdom" in comparison with technical progress? And is it worth replacing the usual curling method ten years ago? I think it's worth a try, because:
- firstly, the effectiveness of such styling with the right approach is not inferior to professional tools,
- secondly, winding the hair on rags - gentle method,
- well, and, thirdly, this method is more “comfortable”, since, while curling your hair at night, you can sleep peacefully, without feeling discomfort.
In addition, the winding of hair on rags is available in the most extreme conditions, on the road or even in nature!
To do this, you will need: a bandage or any other thin fabric, comb, scissors, and, if desired, means of laying.
The bandage is cut into thin strips, not more than 5 cm thick, the tip of a small strand is fixed with a knot in the middle of the strip. Next, you should wind the hair on rags to the desired length, and tie the bandage with another knot.
The minimum time of "aging" perm - 3-4 hours, with the result that it is approximately the same time and will last. In order not to “break” the styling, twisted hair is covered with a kerchief.
And the use of additional styling products during hair curling will help prolong the life of a curled hairstyle.And it is not at all necessary to use professional tools, it is enough to moisten or strong brewing black tea. An aqueous solution of sugar is also suitable, but in this case you will need to wash your hair in 6-10 hours.
In order to make the curls more pronounced, not only cloths, but also paper were used to twist the hair. In this case, you can choose the thickness of the curl that is suitable for you.
During Soviet times, ordinary newsprint was taken. Now Pantry of Beauty recommends that you use white thin sheets that will not leave any traces of paint on your hair.
How to wind your hair on paper?
The essence of the procedure remains the same, only a strip of paper, 7–10 cm wide, protrudes in the form of a curler. A strip of paper is folded into a tube, previously placing a strip of cloth inside.
The length of the cloth should be slightly longer than the length of the paper curler, so it is useful for fixing the curl.
After 4-6 hours, the hairstyle is ready. As in the first case, for additional fixation you can use foam, mousse for styling or ordinary.
The disadvantages of this method of curling
- Perhaps for the first time, winding will seem complicated and you will need help to evenly distribute the strands and gently wind your hair until you put your hand on it.
- No one is immune from creases at the roots! You need to be extremely careful when winding on papilotki.
- To wind the hair on the cloth, it will take more time than creating curls using curling or styler. It takes at least 4-5 hours for full fixation.
Otherwise, this method of curling has no flaws and the result is not inferior to traditional curlers or thermal devices.
Features create hair
Due to the fact that this method of curling is completely safe, it is suitable for any type of hair and almost any length. The easiest way to curl your hair, using cloths, owners of long hair, but if you try, you can curl even the square. Of course, the length will affect the size of the curls, but even sparse hair will gain volume and fluffiness.
Step-by-step instructions for curling
Before winding up you need to create papilotki:

Take cotton fabric and scissors, cut fabric strips about 10-15 centimeters long and about 5 centimeters wide.
The size of the strips depends on the length and thickness, as well as on the desired result: to make fine curls on rags, rather thin ribbons, if you want to get large curls, use wide strips and thick paper.
If you have nothing to make curls, you can use tapes, gauze, bandages, even ordinary napkins.
Before you curl your hair on a rag, it is important to prepare them correctly. Wash your hair and dry your hair with a towel - it should remain slightly damp. Carefully and carefully comb the strands, apply any fixing agent to them and distribute it over the entire length.
The cloth should be wound on a little damp hair - if the hair has completely dried, use a spray bottle to wet the right strand.
- Divide the hair into strands. The thinner the strand, the finer the curl will be.
- Place the tip of the strand in the middle of the file and begin to wind the hair until you get up to the desired height. Such a waving option easily allows you to make a wave from the very roots or curl hair from the middle or just below.
- When the strand is twisted, pull the ends of the fabric strip into a knot to secure the roller. Wide strips are easier to untie, so be prepared that thin papilotki in the morning will have to be cut.

- Screw the whole mass of hair in this way, then cover your head with a scarf or a towel. This will prevent the rollers from spinning if you do the curl overnight and also enhance the effect.
- To get the most luxurious curls, you must wait at least 5 hours. Therefore, it is better to wind your hair at night: while you sleep well, the hair will take on the desired shape.
- After the time of curling, gently unwind the fabric papilotki. Do not hurry and unfold them smoothly, so as not to confuse and not to break the curls.
- Fingers, beat the hair to give it the desired shape, lay curls, fix varnish. If desired, you can decorate it with accessories.


- If you want a more natural result, use strips of different widths simultaneously.
- The hair curled on a rag retains its shape for about as long as you waited for them to unwind. For maximum effect, it is recommended to twist the strands in the evening, and do your hair in the morning.
- Curls last longer if you use fixatives.
Want to get larger spiral curls? Then you will need not only a piece of cloth, but also several sheets of paper (ordinary office Xerox A4 paper will fit). Cut the sheet into wide strips (about 8 cm) - the size of the future curl depends on the width.

Then roll the resulting blanks into cylinders, wrapping them in appropriate-sized pieces of fabric. As a result, you get a more elastic file, a bit like ordinary hair curlers. Create a curl on the same principle as if you were using ordinary rags without paper.
Curling hair on rags is an excellent proof that expensive hair salons and professional devices are not needed for a beautiful haircut, just enough patience and the desire to be beautiful. Experiment, and then you can make a perm even in the absence of electricity and curling.
Did you like it. Put + 1.
The most popular curling devices are still curling and curlers. However, hairdressers do not recommend regular use of thermal devices for styling, as they have a negative effect on the hair structure. Curlers also have flaws. First, with the help of such products it is difficult to wind very long and thick strands. Secondly, curlers, made of poor quality materials, can greatly harm curls. We present to your attention 4 ways how to make spectacular curls without curling and curlers .
FAST ARTICLE NAVIGATION
1 way. Curling hair on paper
Curlers can be easily replaced with pieces. ordinary paper . To do this, you will need several sheets of thick soft paper (not cardboard). In this way, you can make small curls, and spectacular body waves.
Technology perms on paper.
- Before laying you need to make paper curlers. To do this, take a few sheets of paper and cut it into small strips.
- Twist each strip into tubes. Insert a string or small pieces of fabric into the hole of the tubule, with which you will fix the hair.
- Separate slightly wet hair into strands. Take one strand, place its tip in the middle of the tube and twist the curl to the bottom.
- Secure the strand with a string or string.
- After the hair is dry, paper curlers can be removed.
- Fix the result with varnish.
The video below shows step-by-step instructions for creating an effective styling using self-made paper curlers.
What is dangerous daily shampooing? Recent studies have shown that 98% of shampoos contain a huge amount of harmful components that destroy not only our hair, but also health. Substances to be feared are indicated as sodium lauryl sulfate, sodium laureth sulfate, coco sulfate, PEG. This chemistry makes hair lifeless, destroying their structure, but this is not the worst. Sulfates, entering the body through the skin, are deposited in the internal organs, which can provoke various diseases, including cancer. Doctors advise to abandon the use of cosmetics, which include such components. Use only natural products. Our editors advise to get acquainted with the company Mulsan Cosmetic. Shampoos of this brand have no analogues. They are unique in their natural composition and completely safe. Products are manufactured under strict control and comply with all certification systems. We recommend the official online store mulsan.ru. We remind you that natural cosmetics have a shelf life not exceeding one year!
2 way. Curling flagella
One of the easiest ways to make perky curls without thermal instruments and hair curlers is twist hair in flagella .
Technology create spectacular curls:
- Moisturized hair carefully combed and parted.
- Divide the hair into small strands.
- Then you need to make thin flagella. After that, wrap each harness and secure it with a rubber band. It is important to remember that the thinner the strands you take, the smaller the curls will be.
- After all the mini-bundles are ready, go to bed.
- In the morning, loosen your hair and gently comb it with your fingers.
- Fix the result with varnish.
In the video below you will see step-by-step instructions on how to form fervent curls.
3 way. Creating curls with hairpins
Hairpins and hairpins are simple and fast way and curlers.
Technology curling hair with hairpins and pins.
- Comb and moisten the hair, and then divide it into fine strands.
- Select one strand in the neck area. Then you should make a small ring of hair. To do this, wind the straps on your fingers and fix the hairpin at the roots.
- Repeat the steps for all strands.
- Leave the studs overnight.
- In the morning, dissolve the curls, carefully disassemble them with your fingers and fix it with varnish.

4 way. Waving with a T-shirt
It will seem impossible to many girls, but spectacular large curls can be done with simple t-shirts . The result will surprise you: chic persistent waves in a few hours.
Technology styling using t-shirts:
- Before you start laying you need to make a large plait of cloth. To do this, take a T-shirt (you can also use a towel) and fold it into a bundle. Then form a volumetric ring from a harness.
- After that you can start working with hair. Comb the wet strands and apply a special styling gel on them.
- Place the ring of the T-shirt on top.
- Divide the hair into wide strands.
- Each strand in turn curl on a fabric ring and fasten with a pin or stealth.
- After the hair is dry, carefully remove the tourniquet from the T-shirt.
- Fix the result with varnish.

Hairdressing craft requires constant feeding of new knowledge about techniques, trends in the world of hairdressing fashion. And, of course, leaving the school of hairdressing, a graduate should be ready.
Advanced training courses for hairdressers
Making papillotok
In order to create the same curls, which a few centuries ago adorned the beautiful heads of high-class beauties, you will need very little:
- paper,
- scissors,
- braid, rope or bandage.
This simple set will allow you to make papilotki. That is how they once called pieces of paper, which are twisted hair.
 Paper for them is better to take thick. Although, having become accustomed, some ladies can wind curls even on the softest napkins or pieces of the softest toilet paper.
However, it is better to begin to master the art of creating curls with the help of more dense materials. An ordinary office printer paper or a sheet torn from a school notebook is perfect.
They are placed on pieces of paper in such a way that the tips of the same size remain on each side. Then the rectangles are gently rolled into tubes, making sure that the strings remain inside.
How long will curls last?
In order to curl curls look good, we must try to remove the paper as carefully as possible. It is better to start the process from the bottom, straightening the first strands near the neck and gradually moving towards those located near the frontal part.
Curls can be gently straighten your fingers, giving them a finished look. Combing hair is not recommended, otherwise you will get a thick head. This is not bad for creating a complex hairstyle, but such curls will not be left loose, it will look absolutely not aesthetically pleasing.
However, today there are many ways to fix the hair. To do this, on the curls, before you twist them, apply a mousse or gel. Or do the same as our grandmothers did, and sprinkle the prepared strands of sweetened water. And when the curls are fully prepared, spray a little varnish on them. After that, vintage curls will surely remain elastic until the evening.
Technology cheat on curlers
Before you wind the hair on the curlers, they are pre-dried, but not to the end. In the wet (but not wet) hair and wind on curlers. In addition to the curlers themselves, you will need a comb with a handle and fine teeth to separate the strands, and a spray gun with water to moisten too early dried hair strands. It is good to have a second mirror, with which you could look at how you curled your hair at the back of your head.
The separated strands of hair should not be wider than the length of the curlers, only the hair that is precisely wound on each roller will receive the required elasticity and beautiful shape. Keep in mind that each strand should be wound on a roller perpendicular to the surface of the head so that the roller is lying, not scattered all over the head in disarray, but adjacent to the hair roots in an even step.
The harder the curler rolls onto the strand, the tighter the curls will be. To achieve this effect, before winding, pull the strand away from your head, but gently, not painfully.
Fix hair curlers on your head so that your hair is not pressed anywhere. Such a danger exists when using curlers with rubber bands or clamp brackets. It is better if your hair curlers are secured with plastic pins. Always stick the studs against the direction of twisting, and their ends should pierce the previous rollers of the curlers, if possible. The first roller should be placed over the forehead, and the tip of the stud should be pushed into the scalp. Always wind your hair from front to back, and always start from the middle of the head.
If you have long hair, then wind on curlers not too large strands, so that they dry not so long. If you have short hair, which now and then slide off the roller when winding, then lengthen it by wrapping each of them with a piece of paper, then winding the strands will go much easier. If you have thin hair, then moisten it with an easy-to-use retainer to make your hairstyle more stable before winding.
If you want your curls to hold on as long as possible, then wind the hair on thinner hair curlers, but keep in mind that the curvy and curly "hair cap" is obtained only with a chemical curling.
Hair curlers of medium diameter give medium hair a large waviness, and long hair - soft waves, such hair curlers give pomp and volume to short hair.
Thick rollers rollers do not make hair curly, but give pomp and curl of the tips. Small and flexible curlers (they are called papilotkami) give hair a strong tension and make future curls when combing especially lush.
Types of curlers
Velvet velor-coated hair curlers:
Thanks to the material from which they are made, do not damage the hair. A variety of sizes curlers allow you to create curls on the hair of any length. Fixing with sticks does not allow to leave them on the head during sleep. The minimum time that you have to spend in such curlers to get beautiful curls - two hours.
These are flexible soft curlers of various sizes that allow you to quickly fix strands of any length and width. To fix the curl, it is enough to twist the ends of the curlers so that the strand could not slide off them. The form and material allow to leave them during a dream on the head. The minimum time for the formation of curls - from three hours on long hair and one and a half hours - on short.
They have a clinging surface, due to which they stick on hair without elastic bands, clips, sticks, etc. There are different diameters: from large, which allow you to create a voluminous hairstyle, large curls, to small - for small curls. This type of curlers is not suitable for long damaged hair, as it can get tangled, fall off from long hair, further damaging their structure. The minimum time for the formation of curls - from an hour on short dry hair and from 3 hours - on long or short wet hair.
They are plastic or wooden curlers with elastic, fixing the strand. Used to create curls of small diameter. As a rule, used for perm, as well as to create hairstyles in the African style.
Curling occurs due to the heating surface of the curler. Due to the temperature, such laying requires the least amount of time (from 10 to 20 minutes). Curlers suitable for use on dry or slightly damp hair. If you leave the curlers for a minimum time, the curls will be less elastic, if longer - more.
Hair styling on curlers
Curlers give hair fluffiness and slight waviness. With skillful handling techniques with a brush and comb, and provided a well-made haircut from the hair, twisted on curlers, you can create any modern hairstyle.
The beauty and naturalness of hair styled on curlers, always depends on the technique of winding and the type of curlers. The choice of the diameter of the curlers depends on the condition and properties of the hair. For coarse hair, you can use hair curlers of a larger diameter, and for thin hair - a smaller one. When using thin curlers curls will always be small and elastic, the hairstyle will be maintained for a long time. Medium hair curlers on short hair will simply give the hair pomp and volume, on medium-length hair - a large waviness, and on long hair - soft waves. Large curlers are used only for long and semi-long hair to give the hair volume and shape. Laying on the curlers always do on wet hair.
Hair styling with the help of curlers lasts a much longer time than styling with a hair dryer or on electric pliers. The best are hair curlers made of plastic.
Recently, curlers with brushes have become increasingly popular. They have many advantages over conventional ones: they conveniently grab the ends of the strands, which is very important if the hair is cut with a razor, excludes the pinch at the base of the strand, which comes from the fixing gum, which in turn interfered with the styling of the hairstyle, the brush gives the hair a natural waviness and speeds up the drying process. This also eliminates overdrying of the scalp and the appearance of dandruff. To perform modern, slightly wavy or almost smooth hairstyles, it is most convenient to use horizontal curlers of various lengths and diameters.
Before winding up, you need to pay attention to the properties of the hair and, accordingly, to choose a composition for wetting. With hard hair, it is necessary that the composition had a softening effect. For soft hair, apply compositions that make them tougher - "Bito". "Silhouette", "Curl", etc. Wetting the composition makes the hair supple and obedient, and they are easier to fit.
Remember that the width of the strands should not be greater than the length of the curlers. Hair should always be wound perpendicular to the surface of the curler. Strands should be well stretched and very tightly wound. Only in the case of compliance with these three simple rules will your hair look beautiful and stay in shape for a long time.
Safe conditions
To perform any work with the client, the master must take into account and abide by the following rules: The master must protect the client's clothes with a negligee or caped curtain. When working with water, be sure to monitor its temperature. While doing work, do not be distracted and do not talk. It is necessary to monitor the grounding of electrical equipment, its health. Any awkward movement can cause injury to the client. Means for washing and styling hair to use very carefully, so as not to get on the face and eyes of the client.
How to wind your hair with curlers
Curlers - this is probably one of the most common and frequently used tools for creating curls. The result of winding strands on large curlers will be a hairstyle consisting of voluminous curls. At the same time, the inventory of a smaller diameter will allow you to convert a flat head of hair into a shock of miniature naughty curls. We give an algorithm for winding hair curlers:
- First of all, carefully comb your hair in the direction where you plan to lay curls. This technique is necessary in order to neutralize the possible electrification of the hair.
- Separate the first strand in the area of the bang and, stretching it to the side, wind it on the curlers. Continue to create curls, moving from bangs to the crown, then to the back of the head and finally to the temples. The winding of the latter must be done in the direction of growth of the strands. Dried strands that you have not had time to wind, you can moisten a little water or thermal sprays.
- Wait until the hair is completely dry (if you wish, you can use a hairdryer to speed up the process), then gently remove the curlers from the back of the head.
- Carefully comb the curls using a comb with sparse teeth. To extend the "life" created by your hair, fix it with a small amount of lacquer.
For girls who prefer to leave curlers for the night, the most comfortable will seem to be boomer curlers or papilotki. They have the appearance of soft foam rubber with metal wire inside.
Velcro-curlers are considered to be very convenient for wrapping short hair. To fix them, not clamps are provided, but special velcro, which leave no marks on the hair and thus do not spoil the appearance of the finished hairstyle. Creating curls with the help of this kind of devices is quite quickly and easily. However, once again we note that the Velcro curlers are suitable exclusively for owners of short haircuts. Long hair they confuse at least, and as a maximum - damage their structure.

For very understandable reasons, some girls prefer not papilotki and velcro curlers, but classical thermal rollers. Compared with the devices that our mothers and grandmothers had to use, modern heated hair curlers have improved in order. Firstly, they are sold in convenient, compact containers, and secondly, their heating takes much less time, since it is carried out at the expense of electricity. Given that the high temperature is extremely unfavorable for the health of hair, it is desirable to use heated hair rollers in combination with special thermal protective agents.

How to wind hair with curling iron (thermal tongs)
As a rule, winding the hair on thermoscalers does not cause any particular difficulties for girls. First, comb and separate into separate strands dry (by no means wet) and clean hair. Next, start gradually curl strands, moving from the back of the head to the temples. As for the bangs, it should be wound at the very last. It is most convenient to perform the manipulation with forceps on medium and short hair. Of particular importance is the quality of the material from which the heating element is made. Ideally, if it is heat-resistant plastic, which is considered the most benign. In addition, it is desirable that the device has several heating modes, allowing you to select the optimum temperature depending on the thickness and structure of the hair. For girls whose time for beauty guidance is extremely limited, thermoscalls are one of the most advantageous options.

How to wind your hair with an iron
The fact that the hair straightener (iron) can also be used to curl them is not all owners of this wonderful hairdressing tool know. However, by adapting it also for this purpose, you can get a multifunctional device for creating all sorts of original hairstyles. To wind the strand in this way, first stretch it with a flat iron, and then, dividing it in two, twist it into a rope. Finally, pass the flagellum through the plates ironing. Starting hair curling iron, take care of their cleanliness and dryness.

How to wind hair rag curlers
Another nontrivial way to turn into a charming curl - wind the hair on rag curlers. To get such original "tricks", no need to go to the store. It is enough to find an unnecessary cotton graft in the farm and cut it into narrow long strips. Moisten your hair before winding and then comb it thoroughly and divide it into small strands of equal thickness. Next, fix the tip of the future curl on a rag and twist it down to the base. Secure the ends of the cloth with a knot. Do the same with all the strands. When the hair is completely dry, and this will happen after 6-12 hours, remove the rag curlers, gently correct the hairstyle with your fingers and fix the result with hair spray. If desired, rag curlers can be replaced with plastic tubes, pieces of paper or even caps from markers and pens.

How to wind the hair with a beam
If you have no more than 5-10 minutes to create a curly hairstyle, then the most suitable option is to make a bunch of hair. To do this, moisten them with water, lightly towel dry and tie them in a ponytail at the crown. Next, twist the tail in a tight harness and form a bundle of it, to secure which use studs.

Devote the next 6-8 hours to your own business. During this time, your hair is completely dry and will be ready to be dismissed.

You can also achieve a nice curly effect if you put your hair not in one, but in several small bunches all over your head.


How to wind hair with hairpins
It is possible to make curls without harm for hair with the help of ordinary hairpins. This procedure is also not difficult. Split wet hair into fine strands, each of which is twisted inside. The resulting "roller" of the hair, secure the hairpin at the base. Having coped with the task, tie a scarf on the head and go to bed. In the morning, free your hair from accessories, whip curly hair with your fingers and use hair spray.

Photos: Kosyvolosy, Libertatea, Shkolavolos, Elmir, Nazya, 24hair, Weselnybox, Surfingbird, Sovets